

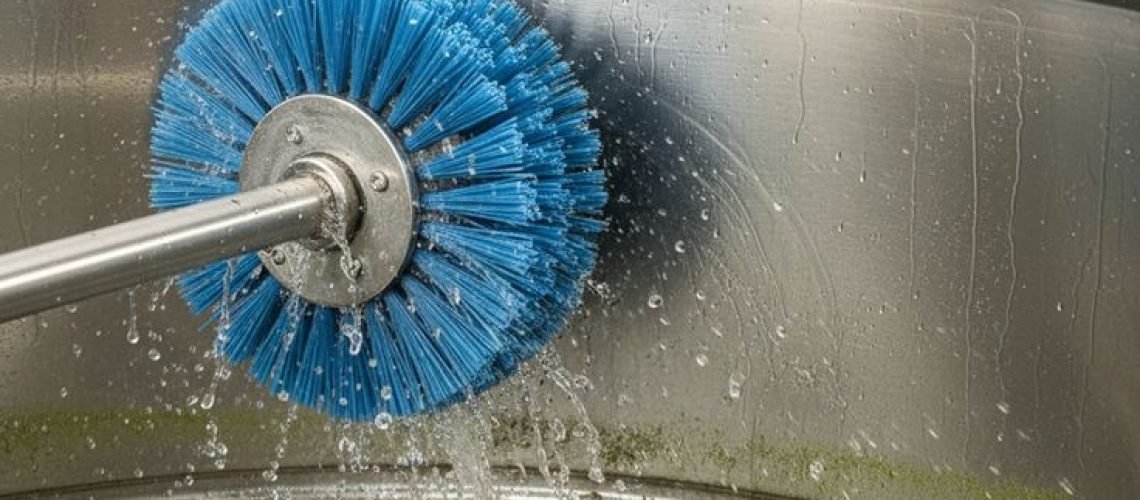
A water tank can look clean from the outside while dirt, sediment and other contaminants collect inside it.
If you depend on a rooftop tank, ground-level reservoir or household storage tank, regular cleaning should be part of your home maintenance routine.
Many Nigerian households store water because public supply can be irregular or because they rely on boreholes, water vendors and private supply systems. Storage makes water available when you need it, but it also creates another responsibility: keeping the tank and its fittings clean and properly covered.
A neglected tank can collect sediment, allow insects or animals to enter, develop biofilm on its surfaces or become contaminated through damaged covers and pipes. Cleaning the tank helps maintain better storage conditions, although it does not automatically make unsafe source water safe to drink.
Why Does a Water Tank Need Regular Cleaning?
Water carries small particles and impurities from its source and distribution system. Over time, some of these materials may settle at the bottom of a storage tank. If the tank has a damaged lid, uncovered opening or poorly protected inlet, additional contamination can enter.
Several problems can affect stored water.
1. Sediment builds up at the bottom
Sand, dust, rust particles and other suspended materials may settle inside a tank. This can happen when water comes from a borehole, tanker or supply system with inconsistent quality.
A layer of sediment does not automatically mean the water contains harmful germs. However, it shows that the tank needs inspection and maintenance.
2. Damaged covers allow contamination
A tank should have a secure lid or cover. Openings can allow insects, rodents, leaves, dust and other debris to enter. Rainwater may also carry dirt into an inadequately protected tank.
Inspect the lid, access hatch, inlet and overflow pipe. Check that screens remain intact and that openings cannot easily admit pests.
3. Slime and biofilm can develop
Microorganisms can attach to damp internal surfaces and form a layer known as biofilm. This can make routine maintenance more difficult, particularly when a tank remains undisturbed for long periods.
Cleaning and appropriate disinfection help maintain the tank, but the exact method depends on its construction, water use and contamination risk.
4. Stagnant water can create other problems
Water that remains in poorly maintained storage systems may develop an unpleasant smell or appearance. Insects can also breed around uncovered tanks or poorly maintained overflow areas.
A clean, covered tank with properly maintained fittings helps reduce these risks.
Signs Your Water Tank Needs Attention
Do not wait until the water becomes visibly dirty before checking the tank. Watch for these warning signs:
- Water has an unusual smell, colour or taste.
- You notice particles or sediment in stored water.
- The tank lid is broken, loose or missing.
- Insects, leaves or other debris have entered the tank.
- The tank has not been inspected or cleaned according to a maintenance schedule.
- The overflow pipe or vent has a damaged protective screen.
- The tank or its supporting structure shows cracks, leaks or other damage.
If you suspect contamination, stop using the water for drinking and food preparation until you have obtained appropriate advice and established a safe alternative. Boiling may address some microbial hazards, but it does not remove chemical contamination.
How Often Should You Clean a Water Tank?
There is no universal schedule that suits every tank. The appropriate frequency depends on the water source, tank design, condition, use and local contamination risks.
The World Health Organization (WHO) provides maintenance guidance for drinking-water storage systems. Its household guidance includes routine inspections, cleaning of smaller storage containers and periodic maintenance of larger tanks. Its advice for storage-tank systems also recommends checking the condition of the tank, its cover, access hatch, vent, overflow and drainage arrangements.
For a household tank, a practical approach is to:
- Inspect the tank and its surroundings regularly.
- Check the cover, inlet, outlet, overflow and vent for damage.
- Arrange internal inspection and cleaning when sediment, contamination or other maintenance needs arise.
- Include a scheduled annual inspection and cleaning assessment as a starting point, adjusting the frequency to the tank’s condition and water quality.
If your tank stores untreated water, receives water from an unreliable source or has experienced flooding or contamination, you may need more frequent attention. Ask a qualified water professional about an appropriate maintenance schedule.
What You Need to Do Before Cleaning the Tank
Cleaning a water tank is not the same as washing a bucket. Tanks can be large, deep, elevated or poorly ventilated. Entering one without proper training and safety equipment can be dangerous.
Before arranging cleaning, prepare the following:
- A qualified tank-cleaning professional where the tank is large, elevated or difficult to access.
- A safe alternative water supply for the cleaning period.
- A way to isolate the tank from the household plumbing system.
- Suitable cleaning tools and protective equipment.
- An appropriate disinfectant and a verified procedure for the tank type.
- A plan for draining and disposing of wastewater safely.
Do not climb an unstable ladder or enter a confined tank yourself. A tank can contain dangerous atmospheres, have slippery surfaces or present a risk of drowning and falls. The WHO advises that only people with relevant training and skills should carry out tank maintenance, with appropriate precautions for entry and chemical handling.
How to Arrange a Safe Tank-Cleaning Process
Step 1: Inspect the tank and its surroundings
Check the tank’s structure, cover, access hatch, inlet, outlet, overflow pipe and vent. Look for cracks, leaks, loose fittings and damaged screens.
Also inspect the area around the tank. Remove rubbish and materials that could contaminate the water or block drainage.
Step 2: Isolate the water supply
A professional should disconnect or isolate the tank appropriately before cleaning begins. Make sure the household has enough alternative water for drinking, cooking, washing and other essential needs.
Do not allow cleaning chemicals or dirty water to enter the household plumbing system.
Step 3: Drain the tank safely
The cleaner should drain the tank using a suitable method. Avoid releasing large volumes of dirty water where they can flood neighbouring properties, enter drainage channels improperly or create stagnant pools.
Step 4: Remove sediment and clean internal surfaces
The professional should remove accumulated sediment and clean the internal surfaces using methods suitable for the tank material.
The process should not damage protective coatings or introduce unsuitable detergents. Ask the cleaner what products they intend to use and whether those products are appropriate for a tank that stores water for household use.
Step 5: Disinfect using a verified procedure
Cleaning removes dirt and deposits; disinfection addresses microorganisms. The disinfectant, concentration and contact time must suit the tank and the intended water use.
Do not guess the amount of bleach to pour into a large tank. Household bleach products differ in concentration, and tank capacity also varies. Ask the professional to follow an appropriate technical procedure and product instructions.
Never mix chlorine-based products with acids, ammonia or other cleaning chemicals. The resulting fumes can be dangerous.
Step 6: Rinse, inspect and refill
After cleaning and disinfection, the professional should follow the required rinsing and flushing procedure. Inspect the tank again before returning it to service.
Refill with water from a source known to be suitable for the intended use. If contamination is suspected or the water is intended for drinking, arrange appropriate water-quality testing or follow guidance from a competent water professional.
Step 7: Secure the tank
Close and secure the access hatch. Ensure that the lid fits properly and that vents and overflow openings have suitable protective screens.
A clean tank will not remain clean if insects, animals and debris can enter through damaged openings.
Remember: A Clean Tank Does Not Guarantee Safe Drinking Water
This distinction is important. Cleaning a tank does not remove every possible hazard from the water entering it.
If you use borehole water, tanker deliveries or another source whose quality you cannot confirm, consider appropriate treatment and testing. The treatment method should match the contamination risk. A filter may remove some particles but not necessarily kill microorganisms or remove dissolved chemicals.
The WHO recommends protecting water during storage and handling. For smaller household containers, the CDC also advises using containers that can be closed securely and dispensing water without placing hands or objects inside.
Read the CDC’s Safe Water Storage guidance for practical advice on preventing recontamination.
Keep Your Water Tank on a Maintenance Calendar
A simple calendar makes it easier to remember inspections and cleaning. You can use a phone reminder, household planner or shared building maintenance record.
| Maintenance task | Suggested frequency |
|---|---|
| Check the tank lid and visible fittings | Monthly |
| Inspect the surrounding area and drainage | Monthly |
| Check for leaks, cracks and damaged screens | Monthly |
| Assess sediment and internal cleanliness | During scheduled inspections |
| Arrange professional cleaning and disinfection | As required; include an annual assessment |
| Review water quality when contamination is suspected | Immediately |
For shared residential buildings, assign responsibility to a named caretaker, landlord, facility manager or residents’ association. Record the date of each cleaning, the person or company responsible and any repairs completed.
Give Your Household a More Reliable Water Supply
Water storage is useful, especially when supply is inconsistent. Nevertheless, a tank should never become an out-of-sight, out-of-mind part of the home.
Inspect it regularly, protect it from contamination and arrange professional cleaning when necessary. Most importantly, remember that safe water depends on the entire supply chain, from the source to the tank and finally to the tap.
A calendar reminder may seem like a small thing, but it can help prevent neglected maintenance from becoming a bigger household problem.
Frequently Asked Questions
1. How often should a household water tank be cleaned?
The right frequency depends on the water source, tank condition and risk of contamination. Inspect it regularly and arrange cleaning when sediment or contamination is present. An annual assessment is a useful starting point, but some tanks may need attention more often.
2. Can I clean my water tank myself?
Small, accessible containers may be manageable if you follow appropriate hygiene and safety instructions. However, large, elevated or enclosed tanks should be handled by trained professionals. Never enter a confined tank without the necessary training and safety precautions.
3. Does cleaning a water tank make the water safe to drink?
Not necessarily. Cleaning removes dirt and deposits, while disinfection addresses certain microorganisms. Neither guarantees that water from an unsafe source is free from chemical or other contamination. Source quality and appropriate treatment matter too.
4. Can I use ordinary household bleach to disinfect my tank?
Do not guess the quantity. Bleach concentration and tank capacity vary, and an incorrect dose can leave unsafe chemical levels or fail to disinfect properly. Use a verified procedure suitable for the tank and follow professional guidance and product instructions.
5. What should I do if water from my tank smells or looks unusual?
Stop using it for drinking and food preparation until you have assessed the problem. Check the tank and source, arrange appropriate inspection and testing where necessary, and use a safe alternative water supply. Do not assume that boiling will remove chemical contaminants.
